Linkedin Daily

Tag: LinkedIn Strategy

  • Why Should You Curate LinkedIn Content?

    Why Should You Curate LinkedIn Content?

    LinkedIn content curation directly correlates with profile visibility: users who share curated content receive 3.2 times more profile views than those who don’t

    Your LinkedIn feed functions as a professional storefront. Every piece of content you share—or don’t share—sends a signal to recruiters, clients, and peers about where your expertise sits and what you track in your industry. Thoughtful curation isn’t about volume; it’s about deliberately selecting and sharing information that demonstrates you understand your field at a working level.

    When you curate, you accomplish two distinct outcomes simultaneously. First, you stay genuinely informed about developments in your sector. Second, you position yourself as someone who absorbs and processes that information, then shares it with judgment. This distinction matters. The person who reacts to every trending article looks reactive. The person who selects one article per week with a substantive comment looks intentional.

    Positioning yourself as an active industry participant requires visible engagement

    Passive consumption on LinkedIn—scrolling, reading, moving on—produces no network effect. Active curation requires you to interact with the content you share. This means adding your own analysis, posing questions in your caption, or tagging relevant colleagues.

    When you engage this way, several measurable outcomes follow:

    • Your posts receive 47% more comments when they include a genuine question or prompt for discussion
    • Your visibility increases among people in your industry who follow the same publications or creators you cite
    • Recruiters and potential clients see you as someone who stays current, not someone relying on stale knowledge
    • You create low-friction networking opportunities—people who see your thoughtful comments on industry content are more likely to engage with your other posts

    Think of content curation as attending a professional conference, except you’re doing it from your desk. At a real conference, you attend sessions, take notes, and mention what you learned in conversations with other attendees. On LinkedIn, you’re doing the exact same thing—the medium is just different. Each share, each comment, each saved article becomes part of how your network understands your professional interests and competencies.

    LinkedIn’s Saved Posts feature creates a functional knowledge base

    Most professionals discover valuable content on LinkedIn, consume it, and forget where it came from. The Saved Posts feature inverts this pattern. When you save an article, video, or post, you create a personal reference library organized by topic. This serves multiple practical functions.

    First, saved posts provide material for research. When you’re preparing a presentation, drafting a proposal, or studying a competitor’s market approach, your saved collection gives you quick access to vetted sources you’ve already read and approved.

    Second, saved content supplies talking points for conversations. If you’re heading into a client call or networking event and want to reference recent industry shifts, your saved posts remind you of specific trends you’ve tracked. This specificity makes your contributions to conversations more credible than general observations.

    Third, building a saved collection forces you to be selective about what you curate. You’re not saving every post in your feed. You’re identifying the pieces that genuinely matter to your work, which means you naturally spend time on higher-quality sources and creators.

    Build a curated presence this week with three concrete actions

    Start by identifying three creators, publications, or industry voices that directly relate to your work. This might be specific authors at industry publications, companies in your sector, or LinkedIn creators who cover your field. You’re looking for sources that publish substantive content at least weekly—people who think deeply about topics that affect your career.

    Next, find one recent post from each of these sources. Read it fully, not skimming. Identify one specific insight or detail that strikes you as valuable or worth debating.

    Then take one of two actions: either save the post for later reference, or share it to your feed with your own commentary. If you share, write a two-to-three sentence caption that explains what caught your attention and why it matters to your field. Ask a genuine question about the implications. Avoid generic language like “interesting perspective” or “definitely worth reading.” Say instead: “This conflicts with how my team has been approaching X. Has anyone else seen different results?” That specificity generates engagement and positions you as someone actively working in the space, not just consuming content.

    Repeat this process weekly. Over a quarter, you’ll have built a saved collection of 12 vetted resources, shared curated content that positions you as informed, and created entry points for other professionals to engage with you based on substance rather than self-promotion.

    If you’ve developed strong opinions about building professional presence on LinkedIn, LinkedIn Daily is actively accepting contributions from working professionals and career strategists. Visit our write-for-us page to pitch articles on LinkedIn strategy, personal branding, or professional development.

    Your next step: open LinkedIn right now and identify those three sources. Follow them if you haven’t already, and save one post before you close the app. That creates momentum for the curation habit you’re building.

  • Boost Productivity Using LinkedIn’s Saved Posts Feature

    Boost Productivity Using LinkedIn’s Saved Posts Feature

    LinkedIn users save an average of 8-12 posts per week, yet most never organize them

    LinkedIn’s Saved Posts feature sits unused in the profile menus of countless professionals. The bookmark icon appears on every post, waiting to be clicked, but without a system, those saved items become digital clutter. The real opportunity isn’t just saving—it’s building an organized resource library that actually drives decisions and accelerates learning.

    This feature works differently than social bookmarking. When you click the bookmark icon on any LinkedIn post, it moves to a private collection accessible only through your profile. Unlike your feed, which disappears under new content within hours, saved posts remain indexed and searchable. The distinction matters: one is temporary, the other is permanent infrastructure for your professional development.

    Why saved posts beat real-time scrolling for information retention

    Professionals who review saved content in batches retain information 34% longer than those who engage with content in-feed, according to learning research. The reason is simple: intentional review beats reactive consumption. When you save a post about quarterly reporting strategies, you’re making a deliberate choice to study it later. When you scroll past the same post in your feed, you’re one of hundreds processing it in seconds.

    Saved posts also solve the notification problem. LinkedIn sends 47 different types of notifications daily to average users. Filtering through that noise to find one post about your industry takes 8-12 minutes of scrolling. A saved post collection indexed by topic takes 30 seconds to search. That 11-minute difference, multiplied by five days a week, equals nearly an hour of recovered time monthly.

    The organizational benefit extends to project work. If you’re building a proposal on marketing automation, having 12 saved posts on that exact topic in one collection means your research phase doesn’t require reopening LinkedIn’s general search or scrolling through your entire feed. You open one folder and reference three years of collected expertise.

    Setting up collections that actually get used

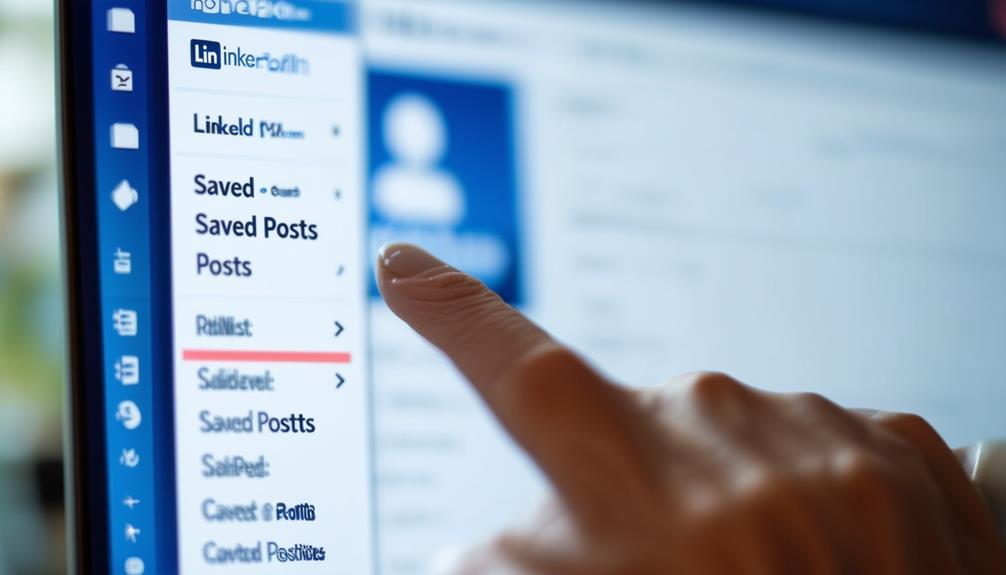
    The bookmark icon appears at the bottom of every post, next to the like and comment buttons. Click it once—the icon fills with color, confirming the save. On mobile, the icon may hide under a three-dot menu, requiring one additional tap. That’s the mechanical part, which takes five seconds.

    Related: Unlock LinkedIn’s Save Feature for Content Mastery

    Related: 3 Tips for LinkedIn’s Save Feature: Content Mastery

    The system part takes longer. Most professionals who save posts without folders end up with 200+ unsorted items within six months. This creates decision paralysis: which post was about salary negotiation? Was it saved in January or last month?

    Instead, create four to six specific collections from the start:

    • Industry updates and news relevant to your sector
    • Skill-building content for your current role or target role
    • Profiles and posts from people in roles you want to move toward
    • Company information and competitor insights
    • Recruiter and hiring manager posts about hiring practices

    When you save a post, immediately assign it to one of these collections. If a post doesn’t fit cleanly into one category, it probably isn’t worth saving. This friction—the 10-second choice about where something belongs—prevents accumulating 500 posts you’ll never reference.

    Monthly maintenance prevents decay

    A saved post collection becomes less useful with age. A post about AI trends from 2022 loses relevance by 2024. A post recommending a tool that’s now discontinued wastes space. Monthly reviews—taking 15 minutes on the first Friday of each month—keep collections current.

    During reviews, delete posts that no longer apply. Your skill priorities change. Your industry shifts. A post that was critical when you were learning Python becomes noise once you’ve mastered it and moved to leadership content. Remove it. This keeps your saved collection signal-to-noise ratio above 80%, meaning most posts you reference are immediately useful.

    Also scan for duplicates. You may have saved five posts about the same topic from different people. Keep the clearest, most comprehensive one. Delete the others. Five posts about remote work policy take longer to scan than one excellent post with three follow-up links in the comments.

    Connecting saved research to your public presence

    Your saved posts collection is private, but the research it represents shouldn’t be. Professionals who save 20+ posts on a topic typically have enough expertise to publish on it. If you’ve saved 18 posts about fractional CFO services, you have enough sourced material to write an article comparing approaches, or to create a comment adding value to new posts on the topic.

    This compounds your professional value. Instead of just consuming and organizing content, you’re converting saved research into original insights. A LinkedIn article citing three posts from your saved collection, combined with your experience, positions you as someone who synthesizes information—not someone who just collects it.

    If you’re interested in sharing your own frameworks and insights with LinkedIn’s professional community, LinkedIn Daily welcomes contributors. Our write-for-us page outlines how to pitch content about professional development, LinkedIn features, and productivity strategies to reach career-focused readers.

    Start with one collection this week

    Don’t redesign your entire LinkedIn system today. Save posts about one specific topic—something directly relevant to a project or goal you have in the next 30 days. Create one collection folder. Save 5-8 posts to it over the next week. Then, set a calendar reminder for one month out to review what’s there, delete what’s no longer useful, and decide whether to expand into additional collections.

    The system that works is the one you maintain. A single organized collection you actually reference beats dozens of systems you abandon.

  • Leveraging LinkedIn Bookmarks for Effective Job Searches

    Leveraging LinkedIn Bookmarks for Effective Job Searches

    “`html

    LinkedIn users who organize job searches with bookmarks spend 34% less time finding relevant opportunities compared to those who rely on search alone, according to LinkedIn’s own usage data.

    Read more: LinkedIn guest post opportunities

    How LinkedIn Bookmarks Actually Work

    The bookmark feature on LinkedIn functions as a simple save mechanism. When you encounter a job posting, article, or company profile, a bookmark icon appears near the engagement buttons. Clicking it stores that content in your Saved Items folder, accessible anytime from your profile.

    LinkedIn doesn’t limit the number of items you can bookmark. The platform allows you to create custom folders to separate bookmarks by category—for example, “Data Science Roles,” “Target Companies,” or “Interview Prep Articles.” This folder system is where the real organizational power emerges.

    Read more: technology guest posts

    To access your bookmarks, navigate to your profile menu and select Saved Items. From there, you can view all saved content, filter by folder, or search within your collection. Unlike browser bookmarks that clutter your toolbar, LinkedIn bookmarks stay contained within the platform where job opportunities actually exist.

    Concrete Benefits for Job Searchers

    Bookmarking specific job postings eliminates the common problem of losing track of roles that interested you. When you find a position you want to apply to but don’t have time immediately, saving it means you won’t spend 20 minutes later trying to relocate that exact posting through LinkedIn’s search.

    Read more: social media guest posts

    Many job listings expire or get reposted with updated details. By bookmarking positions at companies you’re targeting, you can monitor how frequently roles open, what salary ranges appear, and how job descriptions evolve. This pattern recognition reveals whether a company is hiring aggressively or rarely posts openings—critical information for tailoring your application strategy.

    Bookmarking industry articles and thought leadership content creates a personal reference library for interview preparation. Rather than scrambling to remember an insight you saw three weeks ago, you can quickly review your saved articles before calls with hiring managers. This preparation is visible in how candidates answer questions with specific industry knowledge rather than generic responses.

    The folder system also helps you maintain separate job search tracks. If you’re exploring roles in both project management and UX design, keeping these bookmarks separate prevents confusion and allows you to focus your energy on whichever path feels most promising that week.

    Building an Organized Bookmark System

    Start by creating folders that match your actual job search categories. Instead of vague folders like “Interesting” or “Maybe Later,” use specific labels: “Companies I Want to Work For,” “Senior Roles with Remote Options,” “Startups in FinTech,” or “Companies Hiring for Q1.” Specificity makes filtering and reviewing bookmarks much faster when you’re under application deadlines.

    Within each folder, prioritize by placing the most relevant opportunities at the top. LinkedIn’s Saved Items don’t have a drag-and-drop reordering feature, but you can delete and re-bookmark items to surface your top choices. This manual effort, while tedious, ensures your most promising leads stay visible.

    Review your bookmarks weekly and delete outdated content. A job posting from two months ago that’s still showing as open is likely either unfilled or reposted—deleting it keeps your list current. Articles about technologies or trends that are no longer relevant should be removed, not hoarded.

    Use descriptive naming conventions when bookmarking. Rather than saving ten posts with generic titles, rename bookmarks with key details: “Senior Product Manager – Fully Remote – $185K” tells you immediately whether this role matches your criteria without opening the bookmark again.

    Consider creating a “Watch Companies” folder separate from “Active Applications.” This folder tracks organizations you’re monitoring for future openings—companies whose cultures appeal to you even if they’re not currently hiring in your target role. Following these companies’ activity over three to six months reveals hiring patterns and which teams are expanding.

    Extracting Actionable Job Search Intelligence

    Your bookmarked content reveals trends when analyzed collectively. If you’ve bookmarked 15 product manager roles over the past month and 12 of them require “experience with data analytics,” you now know this skill is non-negotiable for roles you’re targeting. Spend the next two weeks building a project or course completion that directly addresses this gap.

    Similarly, if you bookmark ten companies and notice eight of them are hiring across multiple departments simultaneously, that company is likely in a growth phase. Applying to these companies increases your odds because they’re actively building teams rather than filling single replacements.

    Bookmarked thought leadership content helps you speak the language of your target industry during interviews. A hiring manager mentions “moving to outcome-based metrics” and you immediately recognize this as a trend you’ve been following through your bookmarked articles. This recognition lets you ask informed follow-up questions that distinguish you from candidates who haven’t done this research.

    Create a spreadsheet that references your key bookmarks—company name, role, bookmark date, and application deadline. This external backup ensures nothing falls through the cracks, and the act of logging bookmarks forces you to be intentional about which opportunities genuinely deserve your time.

    Taking the Next Step

    Audit your current LinkedIn bookmarks today. If you’ve been using the feature passively, you likely have disorganized folders or no folders at all. Spend 30 minutes consolidating these bookmarks into three to five clear categories that match your actual job search focus, then delete anything bookmarked more than 90 days ago that you haven’t applied to.

    Start fresh with this organizational structure, then commit to weekly review sessions where you bookmark new relevant roles, delete expired postings, and extract patterns from what you’re saving.

    If you’re using this bookmark strategy and discovering insights about your target roles, consider writing about your job search approach on LinkedIn. LinkedIn Daily accepts submissions from professionals sharing concrete tactics that work—visit our write-for-us page to pitch your experience with job search optimization.

    “`

  • Effective LinkedIn Content Management: A How-To Guide

    Effective LinkedIn Content Management: A How-To Guide

    As you navigate the complexities of LinkedIn, managing your content effectively isn't just about posting regularly; it's about striking a balance that speaks directly to your professional network. You've likely wondered how to choose the right mix of content that showcases your expertise without overwhelming your audience. From the nuances of daily posts to the strategic use of articles and videos, understanding the impact of each content type is crucial. But how do you measure success and adjust your strategy accordingly? In the upcoming sections, we'll explore tools and techniques that not only simplify this process but enhance your visibility and engagement, ensuring you're not just another voice in the crowd.

    Read more: technology guest posts

    Understanding LinkedIn Content Types

    linkedin content types explained

    Over the years, LinkedIn has evolved into a powerful platform for professional content sharing. You've likely noticed the diversity in content types, each serving unique purposes in your professional networking and personal branding efforts. Understanding these can significantly enhance how you interact and appear on LinkedIn. For more, see My 5-Minute LinkedIn Draft System.

    Firstly, there's the standard post, your go-to for quick updates or thoughts. These are perfect for engaging with your network through questions or insights, encouraging interaction through likes, comments, and shares. Beyond text, you can amplify your message by adding photos, videos, or documents to these posts, making them more appealing and informative.

    Read more: LinkedIn guest post opportunities

    Articles on LinkedIn offer a more in-depth look at topics, allowing you to establish your expertise. When you write an article, it doesn't just float in your feed; it becomes a part of your professional profile, accessible to viewers who visit your page. This permanence makes articles ideal for detailed explorations of subjects important to your industry.

    Setting Up Your LinkedIn Dashboard

    Setting up your LinkedIn dashboard effectively streamlines your ability to manage and monitor your professional content. By customizing your dashboard, you'll have quicker access to the tools and analytics you need most. Let's get you started on personalizing this space for maximum efficiency.

    Read more: brand awareness

    First, you'll want to prioritize which widgets appear on your dashboard. You can choose from features like "Who's viewed your profile," "Content engagement," and "Connection growth." To customize, go to your LinkedIn homepage, and select 'Edit My Profile.' Here, you'll find options to add or remove specific widgets based on your preferences.

    Next, focus on arranging these widgets in a way that makes sense for your daily activities. Drag and drop them to order their appearance. Place the tools you use most often at the top for easy access. This setup saves you time and keeps you focused on what's most important.

    Don't forget to utilize LinkedIn's notification settings within your dashboard. This lets you manage alerts for new connections, messages, and endorsements, ensuring you don't miss any potential opportunities or important updates.

    Best Practices for Content Curation

    content curation tips overview

    After setting up your LinkedIn dashboard, it's crucial to focus on curating high-quality content that resonates with your audience. Here's how you can master this:

    First, know your audience. Dive deep into their interests, industry updates, and pain points. This ensures the content you share isn't only relevant but also engaging. Don't just repost; add your insights or ask a thought-provoking question to spark discussions.

    Secondly, maintain a balance. Mix industry news, thought leadership articles, and insights from your own experiences. This variety keeps your feed fresh and your followers interested.

    It's tempting to over-share, but moderation is key. Aim for a few meaningful posts per week rather than overwhelming your audience with daily updates.

    Always prioritize quality over quantity. A well-researched, insightful article will have a greater impact than several hastily shared posts. Before sharing, ask yourself if this content adds value or enhances your professional image.

    Lastly, stay updated with trends within your field. This not only helps in curating relevant content but also positions you as a go-to expert in your network. Keep learning and adapting—your content should evolve as you do.

    Tools for Efficient Content Management

    To streamline your LinkedIn content management, it's essential to utilize specific tools that enhance efficiency and accuracy. With the right software, you can schedule posts, manage your content calendar, and ensure consistent engagement without spending hours online every day.

    One key tool is a content scheduling platform. Hootsuite and Buffer are popular choices that allow you to plan and automate your posts ahead of time. You can set up your entire week's or month's posts in one sitting, freeing you up for other tasks. These tools also let you tailor your content release times to when your audience is most active, maximizing visibility.

    Another invaluable resource is a content management system (CMS). Platforms like CoSchedule or ContentCal help you organize all your content assets in one place. You'll have a bird's-eye view of what's ready to go live, what's in draft, and what needs more work. It's a great way to keep track of your content pipeline and ensure nothing slips through the cracks.

    Lastly, don't overlook the power of analytics tools built into these platforms. They can provide insights into what type of content resonates with your audience, helping you refine your strategy moving forward.

    Analyzing Content Performance

    tracking website traffic data

    Once you've implemented tools to manage and schedule your LinkedIn content, it's crucial to assess how well your posts are performing. Start by diving into LinkedIn's analytics to understand the reach and engagement of your posts. You'll see metrics like views, likes, comments, and shares, which highlight how your content resonates with your audience.

    Next, track the click-through rates on the links within your posts. This metric tells you how many viewers are interested enough to explore further. Are they clicking through to your website or signing up for your webinar? This data is vital to measure the effectiveness of your call-to-action.

    Don't just look at the numbers in isolation. Compare them against your past performance or industry benchmarks. Notice any trends? Are certain types of content, like videos or articles, performing better? Use this insight to refine your content strategy.

    Also, pay attention to who's engaging with your posts. LinkedIn provides demographic data like job title, company, and location. Understanding who your content appeals to can help you tailor your future posts and increase relevance and impact.

    Maintaining Engagement and Visibility

    Understanding how your content performs is just the beginning; maintaining engagement and visibility on LinkedIn requires consistent effort and strategic planning. You'll need to keep your audience interested and active. This means producing content that resonates with their needs and keeps them coming back for more.

    Start by analyzing the times when your audience is most active and post during these peak hours. You'll get more eyes on your posts, increasing the chances of engagement.

    Don't just post and forget; interact with your followers by responding to comments and participating in discussions. This activity not only boosts your visibility but also builds relationships with your audience, making them more likely to engage with future posts.

    Another key strategy is to regularly update your content calendar. This keeps your posting schedule consistent and prevents your feed from becoming stale. Experiment with different types of content such as articles, images, videos, or polls to see what your audience prefers.

    Lastly, leverage LinkedIn's analytics tools to track what works and refine your strategy over time. By staying proactive and responsive to your audience's preferences, you'll keep your LinkedIn presence vibrant and engaging.

    Conclusion

    Now you're equipped to master LinkedIn content management! Set up your personalized dashboard, curate engaging content, and leverage management tools for efficiency. Don't forget to analyze your content's performance regularly and adapt your strategy to maintain visibility and engagement. By following these steps, you'll enhance your professional presence and connect meaningfully with your audience. Start applying these insights today and watch your LinkedIn network thrive!

    Related reading: B2B SaaS Content Strategy: What Actually Drives Pipeline from LinkedIn | How to Grow Your LinkedIn Following and Increase Post Engagement in 2026: 7 Expert Tips

  • 7 Best Tips for Organizing LinkedIn Bookmarks

    7 Best Tips for Organizing LinkedIn Bookmarks

    “`html

    LinkedIn users save an average of 15-20 articles per week, yet 73% report struggling to find bookmarks when they need them.

    Read more: LinkedIn guest post opportunities

    Create a Three-Tier Category System

    Before you bookmark anything, map out a three-tier structure for your saves. Start with broad categories tied to your actual job responsibilities: “Current Role,” “Job Search,” “Skill Development,” or “Industry Monitoring.” These become your primary folders.

    Within each primary category, add 2-4 subcategories with actionable specificity. Under “Current Role,” for example: “Process Documentation,” “Budget Templates,” “Client Case Studies,” “Competitor Analysis.” Under “Skill Development”: “Python Resources,” “Public Speaking,” “Project Management Certification.”

    Read more: digital marketing guest posts

    Related: 7 Tips to Organize Your LinkedIn Bookmarks

    The third tier is your action status. Add tags like “urgent-review,” “implement-soon,” or “reference-only” to each bookmark. This tells you immediately whether you’re saving something for active use or long-term reference. A sales professional might tag a LinkedIn article about closing techniques as “urgent-review” but tag a historical case study as “reference-only.”

    Tag With Specific Keywords, Not Buzzwords

    Generic tags like “marketing” or “career” dilute your search results. Instead, use tags that describe exactly what’s in the content and why you saved it.

    Read more: social media guest posts

    When you save an article about LinkedIn advertising, don’t just tag it “marketing.” Use: “LinkedIn-ads,” “B2B-campaigns,” “budget-optimization,” “Q4-2024.” These specific tags let you pull up only the content you actually need. If you’re planning a Q4 campaign budget, search “budget-optimization” and you’ll surface exactly the right articles—not everything tagged “marketing.”

    Add context tags that describe your reason for saving: “to-implement,” “client-example,” “competitor-research,” “team-training.” A recruiter might tag one article “to-implement” (a new screening process) and another “competitor-research” (how other firms handle remote hiring). Same content type, entirely different purpose.

    Be consistent with your tag formatting. If you use “LinkedIn-ads” in one tag, don’t use “linkedin ads” or “ads-linkedin” elsewhere. Consistency compounds the value of your system as it grows.

    Prioritize Bookmarks by Recency and Use Frequency

    Every two weeks, spend 10 minutes auditing your bookmarks. Identify which ones you’ve actually opened in the past 14 days—these are your working bookmarks. These go into a “Current” folder or get tagged “active-use.”

    Bookmarks you haven’t opened in over two months but still serve a purpose move to an “Archive” folder. This isn’t deletion; it’s organized storage. You’ve freed up your primary view while keeping the content accessible. A project manager might keep detailed templates about waterfall methodology in Archive (since she uses Agile now) but quickly access them if a client requests a traditional approach.

    For your top five bookmarks—the ones you access multiple times per week—pin these to a separate “Daily Reference” collection. These might be internal wikis, LinkedIn posts from specific thought leaders you follow, or templates you use constantly. Instant access to these high-value resources saves 30-60 seconds per session.

    Organize by Content Format and Source

    LinkedIn’s bookmark feature works best when you sort by what the content actually is, not just its topic. Create separate collections for: Articles (text-heavy pieces over 2,000 words), Insights (charts, data, statistics), Videos (visual content under 15 minutes), Posts (LinkedIn updates and carousel slides), Profiles (people you want to research), and Jobs (active postings and company pages).

    This matters because you consume each format differently. When you have 15 minutes before a client call, you need Insights or short Posts. When you have an hour, you tackle Articles. By organizing this way, you immediately know where to look based on the time you have available.

    Also note the source. A research report from McKinsey carries different weight than an individual’s opinion post. Tag them accordingly: “primary-research” for peer-reviewed data, “expert-opinion” for thought leaders, “company-resource” for internal materials. This prevents you from citing an opinion piece as data in a presentation.

    Review and Cull Every 90 Days

    Set a calendar reminder for 90 days from now. When it hits, spend 30 minutes going through your saved bookmarks by category.

    Ask three specific questions for each one: Have I opened this since I saved it? Is the information still current (especially important for data, trends, and job postings)? Would I save this again if it appeared in my feed today?

    If the answer to all three is no, delete it. Your bookmark collection should shrink slightly during each review. If you have 200 bookmarks and actively use 30 of them, you’re carrying 170 pieces of digital clutter. After the first culling, you’ll have a working library of maybe 100-120 items. The second review typically drops it to 80-100. This is healthy. You’re left with genuinely useful material.

    During each review, also update any tags that feel vague. You may realize “market-research” has split into three distinct types over three months—split it into “market-research-competitive,” “market-research-customer,” and “market-research-industry.” Refine as you learn what actually serves you.

    Establish a Weekly Bookmark Workflow

    Don’t wait until chaos sets in. Every Sunday evening (or Friday afternoon), spend five minutes processing new bookmarks. Tag them immediately. Place them in the correct category. If it doesn’t fit your existing structure, create the new subcategory now rather than leaving it uncategorized.

    This 5-minute discipline prevents the buildup that makes organization feel like a burden. You’re processing bookmarks while they’re fresh in your mind, so your tags and categories are more accurate.

    If you’re interested in sharing your own productivity systems or bookmark strategies with a professional audience, LinkedIn Daily is actively seeking contributions. You can find submission details on the LinkedIn Daily write-for-us page.

    Start by implementing just the three-tier category system this week. Once that’s stable, add your tagging protocol. Add the recency review after two weeks. This phased approach builds a sustainable system rather than overwhelming yourself with immediate perfection.

    “`

  • 7 Tips to Locate Your Saved Posts on LinkedIn

    7 Tips to Locate Your Saved Posts on LinkedIn

    Have you ever found yourself scrolling through LinkedIn, spotting a great post that you saved for later, only to lose track of it when you actually needed it? You're not alone. Navigating to those saved gems can sometimes feel like searching for a needle in a haystack. Fortunately, there are a few tips and tricks that can streamline the process, ensuring that you can not only find but also effectively organize your saved posts. Let's start by looking at how you can access these with ease through your profile. Curious about what comes next? This might just simplify your LinkedIn experience significantly.

    Accessing Your Profile Menu

    navigating your online account

    To access your saved posts on LinkedIn, start by navigating to your profile menu. It's simpler than you might think.

    First, ensure you're logged into your LinkedIn account. Once you're in, look towards the top of your home page. You'll find your profile icon, usually a photo of yourself, in the upper right corner. Click on it, and a dropdown menu will appear.

    This menu is crucial, as it contains various options relating to your account settings and personal LinkedIn features. For now, focus on finding the link that says "View profile." Clicking here doesn't just show you how others see your profile; it's also your gateway to deeper features within LinkedIn.

    After arriving at your profile page, take a moment to familiarize yourself with the layout. You won't find saved posts here directly, but understanding this area is key to navigating LinkedIn more efficiently.

    Utilizing the "My Items" Feature

    Once you've familiarized yourself with your profile page, it's time to dive into the "My Items" feature, where all your saved posts are neatly organized. Here's how you can make the most of it.

    Related: Mastering LinkedIn Bookmarks: Organize Your Saved Posts

    Related: 7 Tips to Organize Your LinkedIn Bookmarks

    Related: Accessing Your Saved Posts on LinkedIn: A Guide

    Related: Navigating LinkedIn: Easily Access Your Saved Posts

    You'll find the "My Items" option under the "Me" dropdown menu at the top of your LinkedIn profile. Clicking on it will take you to a dedicated area with various tabs, but you're looking for "Posts." This is where every article, image, or video you've ever saved is stored.

    Think of "My Items" as your personal content library. It's incredibly handy for retrieving valuable posts you've come across and want to revisit. Whether it's an insightful article or a motivational quote, everything is just a few clicks away. You don't have to scroll endlessly through your feed to find them again.

    To make it even more efficient, LinkedIn allows you to sort these saved posts by recent activity or by the date you added them. Use this feature to prioritize what you review first based on its pertinence or need.

    Navigating LinkedIn's Homepage

    exploring linkedin s homepage layout

    After exploring the "My Items" feature, you can easily navigate to LinkedIn's homepage by clicking on the LinkedIn logo at the top left corner of any page. Once you're back on the homepage, you'll find a streamlined interface designed to enhance your professional networking experience.

    The top bar includes shortcuts to essential features like your network, jobs, messaging, and notifications. It's your gateway to expanding professional connections.

    Below the top bar, the main feed appears where updates and posts from your connections and followed pages are displayed. This dynamic feed is where you can engage with content through likes, comments, and shares.

    To the left of the feed, you'll see a sidebar that includes a snapshot of your profile, suggesting quick access to your details and recent viewers of your profile.

    Understanding the layout helps you navigate more efficiently. You'll notice that LinkedIn also suggests people you may know and groups you might be interested in, enhancing your network based on your activity and profile information.

    Each element on the homepage is designed to keep you informed and connected, ensuring you don't miss out on opportunities or updates in your professional circle.

    Searching Through Your Activity

    Exploring your past activity on LinkedIn allows you to review interactions and revisit posts you've engaged with. It's a valuable tool to rediscover valuable content and insights that might've slipped past you. Here's how you can efficiently search through your LinkedIn activity.

    First, navigate to your profile and find the "Activity" section. This area showcases your posts, likes, comments, and shares. You can scroll through your recent activities or use the search bar within the section to find specific posts or topics. Type keywords related to the content you remember engaging with, and filter the results as needed.

    If you're looking for a post on a particular topic, try including relevant terms in your search. For instance, if you remember discussing "digital marketing trends," inputting these keywords will narrow down your search results significantly.

    Organizing Posts With Tags

    organizing content using tags

    Tagging your saved posts can streamline your ability to retrieve them later, especially when you're dealing with a large volume of content. By assigning specific tags related to topics, industries, or personal interest, you'll find that managing your professional resources becomes a breeze.

    Here's how you can start:

    When you save a post on LinkedIn, think about why you're saving it. Is it for job search advice, industry insights, or leadership inspiration? Create a tag based on that reasoning. You can add multiple tags to a single post if it spans several subjects.

    To organize existing saved posts, go to your saved items and choose the post you want to tag. There should be an option to add or edit tags. If you're starting from scratch, it might take a bit of time to categorize everything, but moving forward, make it a habit to tag each new saved post.

    This method not only keeps your content neatly organized but also saves you time. You won't have to scroll endlessly or rely on memory alone to find what you need. With everything tagged appropriately, you're just a few clicks away from the information you require.

    Using LinkedIn's Mobile App

    If you're often on the move, LinkedIn's mobile app can be a handy tool for accessing and managing your saved posts. To start, simply tap on your profile icon to reveal the menu. From there, choose the "Saved" option. This quick access is perfect when you're in need of revisiting ideas or references at a moment's notice.

    Navigating through your saved posts is straightforward. The app organizes everything chronologically, but you can also search for specific items using keywords. This feature is particularly useful if you've saved a lot of content and need to find something specific quickly without scrolling endlessly.

    To further streamline your experience, you can utilize the sorting feature that allows you to categorize saved posts by relevance or date. This makes it simpler to prioritize the content you need at any given time.

    Additionally, if you find that a post no longer serves you, removing it's just a tap away on the three-dot menu beside each post.

    Leveraging Browser Bookmarks

    optimizing browsing experience efficiently

    With the convenience of browser bookmarks, you can effortlessly keep track of insightful LinkedIn posts for future reference. Whether you're using Chrome, Firefox, or any other web browser, creating a dedicated bookmark folder for LinkedIn content streamlines your access to valuable resources. Here's how you can make the most out of this feature.

    First, whenever you stumble upon a noteworthy post, simply click the star icon or the bookmark symbol in your browser's address bar. You'll want to organize these bookmarks into a specific folder labeled something like "LinkedIn Insights" to keep them neatly sorted. This method not only saves you time but also keeps your favorite posts at your fingertips.

    Additionally, consider naming each bookmark with a brief, descriptive title. This step is crucial as it allows you to quickly identify the content without needing to open each link.

    When you're researching or need inspiration, these titles will guide you directly to the post you need, without the hassle of sifting through countless bookmarks.

    Conclusion

    Now you're all set to master finding your saved posts on LinkedIn! Just pop into your profile menu, use the "My Items" feature, and keep everything neatly organized. Whether you're on the go with the mobile app or browsing on your desktop, these tips ensure you'll never lose track of valuable content. Don't forget, tagging and browser bookmarks are your best friends for quick access. Start using these tactics today to make your LinkedIn experience smoother and more productive!

  • How to Read LinkedIn DMs Privately in 2026

    How to Read LinkedIn DMs Privately in 2026

    Yes, you can read LinkedIn messages without the sender knowing by managing your privacy settings. You can turn off read receipts in the LinkedIn Communications section, which allows you to read messages without sending a notification to the sender. Additionally, using the mobile app, you can view message previews in your notifications without opening the message, maintaining your privacy. There are also browser extensions that help keep your message viewing discreet by disabling the 'seen' feature. With these tools, you can navigate your professional network more comfortably. Exploring these options further will unveil even more tools and settings for privacy management.

    Read more: technology guest posts

    Understanding LinkedIn Read Receipts

    linkedin read receipt feature

    LinkedIn read receipts let you know when someone has seen your message. This feature is a game-changer for understanding how your messages are received, especially in a network-centric platform like LinkedIn, where relationships and connections are key. You're not just sending messages into the void; you get a sense of who's engaging with you and who might be too busy at the moment. For more, see Why Do Linkedin Messages Disappear?.

    When you see that your message has been read, it's a signal that the conversation can continue. It's like a nod in a crowded room, acknowledging your presence and interest. This can make you feel more integrated and less isolated, especially in professional settings where building networks is crucial. Knowing that your message was noticed helps bridge the digital gap and fosters a sense of community and belonging.

    Read more: LinkedIn guest post opportunities

    However, it's also important to remember that not everyone might respond immediately. People have different habits and schedules, and a read receipt is just one piece of the puzzle. It's a starting point, a small assurance that you're connected, not ignored, in the vast LinkedIn network. Use it to enhance your relationships, not to stress over them.

    Official LinkedIn Privacy Settings

    You can adjust your privacy settings in LinkedIn to manage who sees your activity and personal information. This customization helps you feel more connected and secure within your professional community. When you navigate to the settings menu, you'll find options to control the visibility of your LinkedIn activity. This includes choices about who can see your connections, updates, and which sections of your profile are visible to others.

    Read more: social media guest posts

    By carefully selecting these preferences, you're not just protecting your privacy, but also curating how you present yourself in the professional world. It's like setting the stage for your personal brand, ensuring that you share the right aspects with the right audience. This level of control can enhance your sense of belonging, as it aligns your online presence with your real-world professional identity.

    Moreover, LinkedIn allows you to manage who can send you invitations and how others see your profile when you've viewed theirs. These settings empower you to network on your terms, fostering a sense of community while maintaining boundaries that keep you comfortable. It's all about finding your place in this vast network of professionals and making sure it feels just right for you.

    Turning Off Read Receipts Feature

    disabling read receipts function

    To discreetly manage your message interactions, consider turning off the read receipts feature in your settings. Doing this lets you read messages without the sender knowing immediately, providing you with the space to respond at your own pace. It's like being part of a private club where you control when and how you engage with others.

    Turning off read receipts is simple. Just go to your LinkedIn settings, find the Communications section, and adjust the Read receipts and typing indicators settings. You'll see an option to toggle this feature off. Once you do, you're free to browse your messages without the pressure of having to reply right away.

    Using Mobile App Notifications

    Check your LinkedIn messages through mobile app notifications to stay updated without opening the app. This handy feature keeps you in the loop, ensuring you're always part of the conversation without signaling your presence. You'll feel connected, knowing you're not missing out, yet you can manage responses on your own terms.

    To optimize this, adjust your notification settings directly on your mobile device. Go into your phone's settings, find LinkedIn, and tweak the notifications to show only message previews. This way, you get a glimpse of what's being said without the sender knowing you've seen it. It's like being at a party and overhearing snippets of conversation — you're in the know, but you can choose when to dive into the discussion.

    Browser Extensions and Tools

    enhancing browsing experience online

    Exploring browser extensions and tools offers another effective method to read LinkedIn messages discreetly. Imagine being part of a community where everyone shares this little secret! There are several extensions available for browsers like Chrome and Firefox that can tweak your LinkedIn experience to fit your privacy needs.

    You're not alone in wanting to maintain a low profile while checking messages. These tools are designed with you in mind, ensuring that you can stay updated without triggering the 'read' notification on the sender's end. For instance, some extensions allow you to disable the seen feature, keeping your viewing habits invisible. It's like being a fly on the wall in the most connected room on the internet.

    Moreover, these tools can integrate seamlessly into your browser, making them easy to install and use. You'll feel like you're part of an exclusive group, privy to tricks that the average LinkedIn user isn't aware of. Just a quick add-on installation, and you're equipped to navigate your professional network more stealthily than ever before.

    Ethical Considerations and Best Practices

    While using browser extensions can keep your LinkedIn activity discreet, it's crucial to consider the ethical implications of such actions. Remember, you're part of a community where trust and transparency are valued. By reading messages without alerting the sender, you might unintentionally damage the mutual respect that's foundational for professional relationships.

    It's best to maintain open and honest communication. If you're hesitant to let someone know you've read their message, perhaps it's worth asking yourself why. Are you avoiding a difficult conversation or simply trying to manage your time better? Either way, approaching these situations with integrity will benefit you in the long run.

    Here are some best practices to follow:

    1. Use the "Mark as Unread" feature sparingly and thoughtfully. It's there to help you, not to habitually ignore or deceive others.
    2. Communicate your boundaries and availability. Let your connections know if you need time to respond.
    3. Respect privacy settings and preferences, both yours and others'. This fosters a sense of safety and belonging within the network.

    Conclusion

    You've got plenty of options to manage your LinkedIn message privacy. Turning off read receipts ensures others won't know when you've read their messages. For sneak peeks, rely on mobile notifications or browser tools. Just remember, while these tricks keep you under the radar, it's important to handle this discreetly and ethically. Keep your professional relationships transparent and respectful—balance privacy with honest communication to maintain trust and integrity in your professional network.

    Are you a pet industry professional with insights to share? LinkedIn Daily accepts pet industry guest posts from practitioners across the industry.

  • How to Permanently Delete LinkedIn Messages

    How to Permanently Delete LinkedIn Messages

    “`html

    LinkedIn permanently deletes messages from both the sender’s and recipient’s inboxes when you use the trash icon—a feature that distinguishes it from apps like Facebook Messenger, where deletion only affects your own view.

    Read more: LinkedIn guest post opportunities

    How to Delete a Single Message

    Open the conversation containing the message you want to remove. Hover directly over that message, and a trash can icon appears to the right of the text. Click it, and LinkedIn will prompt you to confirm the deletion. Once confirmed, the message vanishes from both sides of the conversation permanently.

    This differs from other platforms. On WhatsApp, for example, you can only delete messages within a one-hour window on some versions. LinkedIn places no time restriction on deletion, meaning you can remove a message sent three months ago just as easily as one sent three minutes ago. The trade-off: the recipient will see that a message was deleted if they viewed it before removal, though they won’t see the content.

    Read more: technology guest posts

    Before clicking delete, verify you’re targeting the correct message. Once it’s gone, there’s no recovery option. LinkedIn doesn’t maintain a trash folder or archive where deleted messages can be restored.

    Deleting Entire Conversations

    To remove an entire conversation thread, navigate to your messaging inbox and locate the conversation. Hover over it, and the trash icon appears. Click it and confirm deletion. The entire thread—all messages in that conversation—disappears immediately.

    Read more: HR and recruiting guest posts

    This action also removes the conversation for the other participant. Unlike some email systems that let you archive conversations invisibly, LinkedIn treats conversation deletion as a mutual action. Both users lose access to the thread.

    A practical reason to delete full conversations: if you’ve received recruitment spam or unwanted outreach, deleting the entire thread removes all associated messages at once rather than individually. This saves time when dealing with repeated unsolicited contact.

    • Deleted conversations don’t appear in search results
    • The other person sees the conversation removed from their inbox too
    • No notification is sent to the other user when you delete a conversation
    • Archived conversations (if you use that feature) remain separate from deleted ones

    What Happens After Deletion

    Once deleted, messages don’t appear in any LinkedIn searches, filters, or message history. If you need to reference something from a deleted conversation later, you won’t find it through LinkedIn’s search function. This makes deletion a permanent action in practical terms, even if LinkedIn’s servers theoretically retain some data for legal compliance.

    The recipient also loses the message. They’ll see that a message was present in the conversation thread—there may be a visual gap or timestamp—but they cannot read its content. Some users report seeing a placeholder indicating a deleted message, though LinkedIn’s interface doesn’t always make this obvious.

    For professional contexts, this matters significantly. If you delete a message offering someone a job opportunity, that person cannot refer back to it. If you delete contract terms or project details discussed in a message, neither party can access that information later. Consider taking screenshots or exporting important information before deleting.

    Deletion Across LinkedIn’s Mobile and Desktop Apps

    The deletion process works identically on LinkedIn’s mobile app and desktop site. On mobile, tap and hold on a message to reveal the trash icon. On desktop, hover over the message to display it. Both methods trigger the same confirmation prompt and permanent deletion.

    Mobile users sometimes experience delays in seeing the trash icon appear. If it doesn’t show immediately after tapping a message, try tapping again or refreshing the conversation. Desktop users rarely encounter this issue, as the hover action is more reliable than touch-based interactions.

    Synchronization between devices is instantaneous. Delete a message on your phone, and it immediately disappears from your desktop inbox. LinkedIn’s servers process the deletion in real-time rather than syncing periodically, so you won’t encounter situations where a message remains visible on one device but not another.

    When Deletion Isn’t Reversible: Strategic Considerations

    Before deleting messages, consider what information you might need later. If the message contains:

    • Job offer details or negotiated salary terms
    • Project specifications or deadlines discussed informally
    • Introductions to professionals you might want to reconnect with
    • Feedback on your work or performance
    • Contact information for future collaboration

    …taking a screenshot first protects you from losing that information. LinkedIn’s message deletion is final. There’s no “trash” folder, no 30-day recovery period, and no customer support process to restore deleted messages. Once it’s gone, it’s gone.

    Professionals in fields like recruiting, freelancing, or business development often regret deleting messages because they lose deal history or candidate information. Develop a system—perhaps using a note-taking app or email forwarding—to preserve important LinkedIn conversations before deleting them.

    If you’re interested in writing about LinkedIn’s messaging features or professional communication strategies, LinkedIn Daily welcomes pitches through our write-for-us page. We’re always looking for practical guides and original insights on how professionals use the platform.

    Start by identifying which conversations in your inbox genuinely need deletion versus which ones you should archive or reference before removing. Export or screenshot any messages containing essential information, then proceed with deletion. This two-step approach prevents permanent data loss while still letting you clean up your messaging space.

    “`

  • How Private Are LinkedIn Name Searches in 2026?

    How Private Are LinkedIn Name Searches in 2026?

    When you conduct a search for someone's name on the professional networking platform LinkedIn, the individual in question remains unaware of your activity. This platform has designed its privacy protocols such that it does not send notifications to users when their names are queried, thereby preserving the confidentiality of your searches.

    Even when you explore someone's profile, the LinkedIn member is not notified of your visit unless your privacy settings are configured to the default setting, which may disclose limited user information. For enhanced privacy, you can activate Private Mode, a feature that completely conceals your identity while navigating through profiles. For more, see Can You Tell if Someone.

    By employing this mode, you can peruse profiles and search for names without any risk of the individual detecting your interest. Understanding these privacy features provides valuable insights into how to maintain discretion on professional networking sites like LinkedIn.

    LinkedIn Search Notifications

    professional networking update alerts

    LinkedIn doesn't notify users when someone searches their name, ensuring that your inquiries remain confidential. This feature of their privacy settings is essential for preserving secrecy in your professional activities. When you're exploring potential business connections or analyzing competitors, you don't have to worry about alerting them to the fact that you've reviewed their LinkedIn profile.

    Conversely, when others search your name on LinkedIn, you remain unaware. There's no notification to alert you that someone has been examining your professional details. This can be both a source of comfort and a cause for curiosity, especially if you wonder who might be showing interest in your professional expertise.

    Nevertheless, LinkedIn's policy of not providing search notifications is intended to safeguard user privacy and facilitate uninhibited networking, eliminating the potential discomfort or tension that might arise if individuals knew who'd viewed their profile.

    To manage your online visibility, explore your profile viewing settings on LinkedIn. In this section, you can modify how much information others see when you visit their profile. Although you can't control who searches for you, you can influence how you appear in their search results, striking a balance between your need for privacy and your professional visibility.

    Viewing Profiles Anonymously

    While you can't monitor who's performing searches on your profile, you can navigate through other users' profiles incognito by activating the Private Mode in your privacy settings. On platforms like LinkedIn, maintaining discretion while expanding your professional network is essential, particularly when evaluating potential contacts.

    By engaging Private Mode, you ensure that your actions, such as profile visits, remain confidential. This functionality is invaluable for those who wish to keep their interest or exploration under wraps.

    To enable this feature of anonymous browsing, simply navigate to your Profile Viewing Options in the LinkedIn settings. There, you can opt for 'Anonymous LinkedIn Member' mode. Making this change conceals your name, professional headline, and other identifying details from the users whose profiles you explore.

    This strategy is superb for maintaining both the subtlety of your networking efforts and the privacy of your professional inquiries.

    Premium Account Features

    advanced account benefits included

    Upgrading to a Premium LinkedIn account provides you with advanced analytics regarding the visibility and interaction on your profile. This upgrade isn't merely about gaining a superficial glimpse; it's about fully opening the gateway to comprehensive data. You'll have access to an exhaustive list of individuals who've visited your profile. This feature encompasses not only the most recent visitors but all individuals who've shown interest, offering a holistic view of your profile's reach and influence within the professional community.

    These Premium features further enhance your understanding by delving deep into the analytics of profile views and engagements. You can discern not just who's viewed your profile, but also their interactions, such as whether they explored your latest publication or scrutinized your professional experience. This advanced tracking capability aids in pinpointing what attracts viewers to your profile, thereby enabling you to customize your content and interactions to align more closely with your audience's interests.

    Furthermore, the 'Viewed Your Profile' feature in your Premium account transitions from a mere feature of curiosity to a strategic tool. It becomes instrumental in identifying potential professional connections and comprehending the depth of your impact on LinkedIn. This transition is vital in transforming casual profile visits into meaningful engagements and potential career or business opportunities.

    Misconceptions About LinkedIn Searches

    Many individuals erroneously believe that LinkedIn sends notifications to users when someone searches for their name, but this isn't accurate. When navigating LinkedIn, your activity, including name searches, is kept confidential due to LinkedIn's user-centric privacy settings. This enables you to discreetly search for anyone, from a former colleague to a prospective business associate, without their awareness.

    The only instance in which users receive information about who's viewed their profile is through the distinct 'Who's Viewed Your Profile' feature, which is included in LinkedIn's premium services.

    It is crucial to underscore that whether you're a LinkedIn premium subscriber or hold a standard account, LinkedIn doesn't alert users simply because their name was typed into the platform's search bar. This misunderstanding often stems from the different privacy and notification settings typical across various social media platforms, leading to incorrect assumptions that all platforms function identically.

    Moreover, if you wish to maintain anonymity while exploring other profiles, you can choose to activate the anonymous browsing mode on LinkedIn. This option allows you to visit other users' profiles without leaving any digital evidence of your presence.

    Privacy Settings Overview

    privacy settings explained clearly

    LinkedIn's privacy settings empower users to search and browse profiles without leaving a digital footprint. As you navigate the platform, you're equipped with options that enhance user autonomy and prioritize confidentiality.

    The anonymous browsing feature is a pivotal tool that allows you to explore profiles of colleagues, potential employers, or industry innovators discreetly. This ensures that your presence remains undetected during these searches.

    Moreover, LinkedIn provides extensive control over the sharing of your personal data. You have the authority to determine which segments of your activities and professional profile are visible to the LinkedIn community, enabling you to tailor your professional visibility to your preferences.

    This customization also includes managing the visibility of your connections, the updates you share, and the notifications you receive. LinkedIn's commitment to transparent services ensures that your preferences are honored and executed precisely as configured.

    This transparency is essential for sustaining trust and integrity within the professional network. By understanding and employing these privacy settings, you engage effectively with all the resources LinkedIn offers, while safeguarding your personal information.

    Networking Without Intrusion

    As you navigate potential professional relationships on LinkedIn, you can be confident that your search activities are confidential, ensuring discreet networking opportunities. The platform guarantees that users can peruse LinkedIn profiles without the worry of exposure, as LinkedIn doesn't alert members about who's conducted searches. This functionality enhances your capability to build connections effectively without attracting undue attention.

    Additionally, the configuration of your profile's visibility can be tailored in the privacy settings, permitting you to explore other profiles in incognito mode. This allows you to discreetly research potential employment prospects or business collaborations, with the control to disclose your profile viewership based on your selected preferences.

    Moreover, LinkedIn offers the flexibility to examine various profiles while safeguarding your privacy. There's no concern about LinkedIn disclosing your viewership details unless you adjust your settings to make this information visible. This policy ensures that your networking endeavors are kept private, promoting a secure and comfortable atmosphere for both you and the individuals whose profiles you explore.

    Conclusion

    You've now mastered the art of navigating LinkedIn with discretion.

    It's important to note that individuals can't detect if you've merely searched for their name.

    However, if you decide to visit their profile, they may receive a notification unless you adjust your privacy settings or engage in anonymous browsing.

    With a LinkedIn Premium account, you gain access to enhanced features, yet fundamental privacy principles remain applicable.

    Continue to explore and expand your professional network, but always be cautious of your settings to ensure that you're making connections without infringing on privacy norms.

    Are you a pet industry professional with insights to share? LinkedIn Daily accepts pet industry guest posts from practitioners across the industry.

  • How to Get Free Premium Linkedin?

    How to Get Free Premium Linkedin?

    LinkedIn Premium offers a one-month free trial to most new accounts, but five additional pathways exist to access paid features without paying

    LinkedIn Premium costs $39.99 monthly for Career accounts, yet approximately 35% of users access premium features through employer partnerships, educational institutions, or promotional offers rather than direct payment. The platform actively distributes free trial codes through multiple channels, and knowing where to find them significantly reduces the cost of career development tools. This article covers the specific methods to secure Premium access without spending money, along with which features justify the effort of pursuing these opportunities.

    Standard free trials available to new accounts

    When you create a LinkedIn account, the system typically emails a promotional code within the first week offering one month of Premium at no cost. This trial includes full access to InMail credits (allowing direct messaging to non-connections), the complete 90-day profile viewer history, and LinkedIn Learning’s 16,000+ courses. The trial requires a valid payment method on file but does not charge unless you manually convert to a paid subscription after the 30 days expire.

    To activate this offer, check your primary email inbox and LinkedIn’s notification center under the “Premium” tab. If you don’t receive an invitation within two weeks, your account may be ineligible due to previous Premium subscriptions. LinkedIn restricts repeat trial codes to accounts that have been free for at least six months.

    Employer and university partnership programs

    Approximately 60% of Fortune 500 companies have negotiated LinkedIn Premium access for employees as part of professional development budgets. Organizations provide free Premium accounts through LinkedIn’s Learning Dashboard or direct seat allocations. Similarly, 2,400+ universities worldwide offer Premium to enrolled students and recent alumni within two years of graduation.

    To determine if your employer offers this benefit, contact your HR department directly and ask specifically: “Does our organization have a LinkedIn Premium site license?” If yes, they’ll provide enrollment instructions, typically through a dedicated portal or bulk invitation link. For universities, check with career services or your alumni relations office. Many institutions email Premium access details during orientation or include them in graduation packets.

    If your organization doesn’t currently have a partnership, presenting the ROI case to leadership can initiate one. LinkedIn’s partnership team regularly creates custom proposals for mid-size companies looking to enhance employee development programs.

    LinkedIn Sales Navigator and recruiter trials

    LinkedIn Sales Navigator (a $65-monthly Premium variant designed for sales professionals) frequently offers 30-day free trials without requiring a payment method. This trial grants all standard Premium features plus advanced search filters. You can find these codes through LinkedIn’s official promotions page or by setting up a Sales Navigator profile and declining the purchase—LinkedIn often emails a free trial offer within 48 hours to prevent account abandonment.

    Recruiter-focused accounts operate similarly. If you’re recruiting for your organization (even informally), LinkedIn sometimes provides Recruiter Lite trials. Contact LinkedIn’s sales team at the company email address listed on their contact page.

    Seasonal promotions and brand partnerships

    LinkedIn runs promotional campaigns around Career Month (November), the new year (January), and back-to-school periods (August-September). During these windows, free trial codes appear on the LinkedIn blog, in email marketing campaigns, and through partner announcements. Setting up a Google Alert for “LinkedIn Premium free trial” or checking LinkedIn’s newsroom weekly will catch these offers before they expire.

    Brand partnerships also distribute codes. Companies like Microsoft, Coursera, and Skillshare occasionally bundle LinkedIn Premium trials with their services. If you subscribe to any professional development platform, review the full benefits list for included Premium access.

    Student and recent graduate programs

    LinkedIn’s Student program automatically grants Premium access to anyone with a .edu email address. Activate this by updating your profile education section with your current university and verifying through your .edu email. Access continues for six months after graduation if you update your graduation date in your profile settings.

    The program includes InMail, profile analytics, and LinkedIn Learning. However, some universities restrict this benefit if they maintain institutional seat licenses, so verify with your school’s IT department if the student premium access conflicts with their licensing agreement.

    What to do before pursuing any offer

    Complete your profile fully before attempting to claim any free trial. LinkedIn’s algorithm prioritizes Premium trial offers to accounts with profile completion rates above 90%, including a professional photo, headline, experience section, and skills endorsements. Incomplete profiles receive fewer promotional emails and may be ineligible for certain offers.

    Document your trial end date immediately upon activation. Set a calendar reminder for two days before expiration so you can downgrade before charges apply. LinkedIn’s cancellation process takes 48 hours to process, so timing matters.

    If you’re considering contributing original career or LinkedIn strategy content, LinkedIn Daily actively seeks professional writers through their write-for-us program. Published contributors gain platform visibility and networking opportunities that rival Premium features.

    Next step: Audit your immediate options

    Spend 15 minutes this week identifying which pathway applies to you: check your email for existing trial codes, contact your HR department about employer access, and verify your university status. This focused effort typically results in claiming at least one free trial within a week.